Fire-Resistant Construction
Homes in wildland-urban interface (WUI) zones are not destroyed by the fire front — they are ignited by embers. Research by the Insurance Institute for Business & Home Safety (IBHS) and Cal Fire consistently shows that 90% of structure losses in WUI fires are caused by embers landing on combustible materials: wood shake roofs, wood decks, open attic vents, and dry mulch against the foundation.
This means fire-resistant construction is largely about closing ember entry points and removing ignitable fuel close to the structure. You do not need to build a fireproof bunker; you need to eliminate the dozen most common ignition pathways. This page walks through every step in order of impact, from the ground up.
Educational use only
This page is educational. Wildfire and structure-fire response varies by jurisdiction. In any active fire event, follow CAL FIRE / NIFC / local fire-marshal guidance. Building modifications must comply with your local building code; consult a licensed contractor or fire-protection engineer for hardening that affects egress, structural members, or chimney/flue components.
Wildfire Season 2026 is starting early
The National Interagency Fire Center (NIFC) 2026 outlook flags above-normal wildfire risk across Texas, Florida, Georgia, and the Carolinas through summer. Western snowpack sits at a 40-year low, shortening the spring buffer. If you live in a fire-prone area, treat the hardening steps below as urgent, not optional. Do the 5-foot (1.5 m) non-combustible zone and ember-resistant vents this spring, before the first red-flag warning.

Step 1 — Understand the Zone System
The California Department of Forestry and Fire Protection (Cal Fire), the National Fire Protection Association standard NFPA 1144, and the 2021 International Residential Code (IRC) all use a concentric zone model for defensible space. Think of it as three rings around your home:
| Zone | Distance | Goal |
|---|---|---|
| Zone 0 | 0–5 ft (0–1.5 m) | Noncombustible materials only; no ignition pathway to structure |
| Zone 1 | 5–30 ft (1.5–9 m) | Lean, green, and clean; fuel continuity broken |
| Zone 2 | 30–100 ft (9–30 m) | Reduced fuel density; fire travels lower and slower |
Start with Zone 0 — it has the highest impact per dollar and requires no permits in most jurisdictions. Many homes that survived the 2018 Camp Fire and 2021 Dixie Fire had Zone 0 hardening even when neighbors' homes burned.
Step 2 — Establish Zone 0 (0–5 ft (0–1.5 m))
Zone 0 is everything within 5 feet (1.5 m) of your foundation, walls, deck edges, and fence connections. This zone must be entirely noncombustible or maintained as bare earth.
Remove immediately:
- All wood mulch within 5 ft (1.5 m) of the home. Replace with gravel, decomposed granite, or concrete pavers. River rock (1.5-inch / 3.8 cm diameter minimum) works well.
- Any wood, plastic, or composite deck boards within 5 ft (1.5 m) of the structure. Replace with concrete, porcelain tile, or Trex Transcend (which passed ASTM E-108 fire testing).
- Dead or dry vegetation including grass. Maintain bare soil or low-water noncombustible groundcover.
- Combustible storage: firewood, propane tanks (relocate minimum 30 ft (9 m) from structure), lumber piles.
- Wood fences that connect directly to the home. Metal fences or a 6-inch (15 cm) concrete gap at the house connection breaks the ignition pathway.
Cost: Gravel and pavers in Zone 0 typically run $2–$8 per sq ft ($21–$86 per m²), depending on material. For a 5-foot perimeter around a 2,000 sq ft (186 m²) footprint home, expect $1,500–$5,000 total.
Field note
Do not substitute "fire-resistant" mulch products for Zone 0 clearance. Products marketed as fire-resistant mulch are merely slower to ignite — when exposed to sustained ember showers, they still ignite. The only safe material within 5 feet (1.5 m) of your home is noncombustible. Gravel is the standard; concrete is ideal.
Step 3 — Clear Zone 1 (5–30 ft (1.5–9 m))
Zone 1 is not a clear-cut zone — it is a fuel management zone. The goal is to interrupt vertical and horizontal fuel continuity so a fire approaching from Zone 2 cannot climb from ground fuel to shrubs to tree canopy.
Vegetation guidelines for Zone 1:
- Remove all dead vegetation. This is the single most impactful action.
- Cut grass short: maximum 4 inches (10 cm) height during dry season.
- Space shrubs so there is a minimum 4-foot (1.2 m) gap between shrub crowns.
- Remove all ladder fuels — branches within 6 feet (1.8 m) of the ground on any tree within Zone 1. This prevents ground fire from climbing to the canopy.
- Space trees so canopy edges are at least 10 feet (3 m) apart (18 feet (5.5 m) on slopes greater than 20%).
- Remove any tree within 10 feet (3 m) of a structure.
What to plant: Irrigated lawn, succulents, and low-growing, high-moisture-content shrubs (California fescue, Salvia, native bunch grasses) are the most fire-resistant ground covers. Avoid: juniper, arborvitae, ornamental grasses, rosemary, and lavender — all ignite readily.
Step 4 — Upgrade the Roof
The roof is the largest flat surface in your home's "ember catch" profile. A wood shake or cedar shingle roof will ignite from a single ember landing in a dry crevice between shingles.
Class A roofing materials (ASTM E108 Class A rating, highest fire resistance):
- Asphalt composition shingles (Class A): Owens Corning Duration, GAF Timberline HDZ — $2–$5 per sq ft ($21–$54 per m²) installed
- Concrete tile: $4–$8 per sq ft ($43–$86 per m²) installed; heavy (9–12 lbs/sq ft / 44–58 kg/m²) — verify roof framing load capacity before installing
- Metal roofing (standing seam, Class A when tested): $7–$14 per sq ft ($75–$150 per m²) installed; 50-year lifespan typical
- Fiber cement shingles (James Hardie Roofing): Class A; $4–$7 per sq ft ($43–$75 per m²)
What to avoid: Wood shakes and cedar shingles are Class C or unrated. Even fire-retardant-treated (FRT) wood roofing is only Class B and the treatment degrades over 10–15 years.
Roof installation details that matter:
- Install continuous ridge vent with baffled ember-resistant mesh (Brandguard, DCI, or equivalent) — ridge openings are a primary ember entry point into the attic.
- Seal all roof-to-wall intersections with metal flashing, not wood trim boards.
- Replace wood fascia and soffits with fiber cement or aluminum. These are frequent ignition points.
- Install leaf guards or metal screens (1/8-inch / 3 mm mesh maximum) in all gutters, or use solid-cap gutter covers.
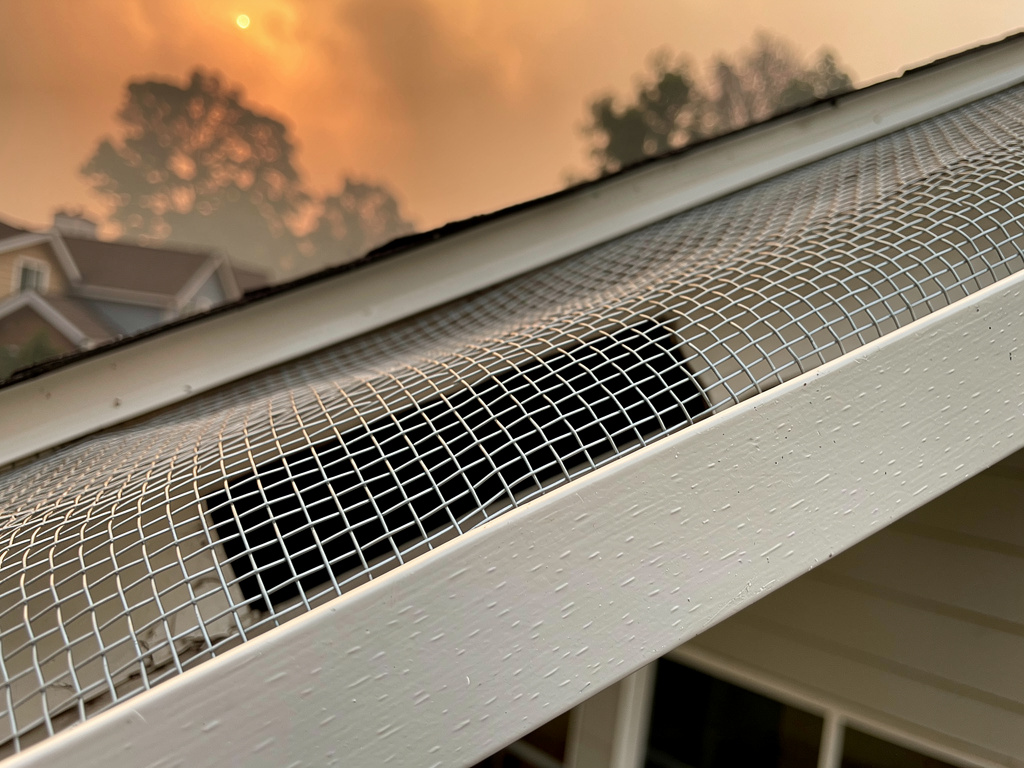
Step 5 — Install Ember-Resistant Vents
Attic and foundation vents are the most underestimated entry point for embers. A standard rectangular louvered foundation vent has openings large enough for embers to pass directly into the crawl space, where they can smolder for hours before igniting framing.
The standard: IRC Section R302.2 (2021) requires ember-resistant vent construction for homes in WUI zones. This means 1/8-inch (3 mm) maximum opening size in any vent screen.
Step-by-step vent replacement:
- Inventory all vents. Walk the perimeter and note every foundation, crawl space, and attic vent. Count them and measure the rough opening size.
- Purchase replacement vents. Brandguard Vent (model BVG-1/8), O'Hagin Vent (all models), or Vulcan Vent (tested per ASTM E2886) are IBHS-tested products. Cost is inexpensive to affordable per vent depending on size.
- Remove the old vent by unscrewing the flange screws and pulling the vent unit out.
- Clean the opening. Remove any accumulated debris, old caulk, or insulation blocking the rough opening.
- Insert the new vent. For stucco walls, use a stucco-flange vent and caulk all four edges with elastomeric sealant rated for exterior use.
- Test airflow. Hold a tissue near the vent interior on a breezy day. You should still feel air movement — ember-resistant vents restrict airflow by 10–30% versus open vents, which is acceptable.
Do not screen over existing vents. Layering standard window screen over a louvered vent reduces airflow to the point of moisture problems in crawl spaces. Replace, do not cover.
Step 6 — Replace Combustible Siding
Vinyl siding melts and pools burning at approximately 280°F (138°C) — it fails early in fire exposure, exposing the wall sheathing. Wood lap siding ignites. Fiber cement is the standard replacement material for WUI construction.
Siding comparison:
| Material | Fire Rating | Cost Installed (per sq ft / m²) | Notes |
|---|---|---|---|
| Fiber cement (James Hardie HardiePlank) | Class A | $5–$10 / $54–$108 | IRC 2021 compliant; most common replacement |
| Stucco (traditional 3-coat) | Class A | $8–$15 / $86–$161 | Excellent fire resistance; labor-intensive |
| Brick or stone veneer | Class A | $12–$30 / $129–$323 | Best performance; high cost |
| Fire-rated OSB (Huber Zip-R) | Class A sheathing | $3–$5 / $32–$54 | Used as sheathing layer under other materials |
| Vinyl siding | Class D (no rating) | $3–$7 / $32–$75 | Avoid in WUI zones |
Fiber cement installation steps:
- Remove old siding down to the wall sheathing. Inspect sheathing for moisture damage — replace any soft or discolored panels.
- Install housewrap (Tyvek HomeWrap or equivalent) over sheathing with 6-inch (15 cm) horizontal overlaps, lapped shingle-style (upper course overlaps lower) to shed water.
- Install starter strip — a 1.25-inch (3.2 cm) wide strip of fiber cement at the bottom course to maintain the correct reveal angle.
- Install planks from the bottom up using 1.5-inch (3.8 cm) hot-dipped galvanized or stainless steel siding nails. Face-nail 1 inch (2.5 cm) from the bottom edge of each plank at each stud location — do not miss studs.
- Caulk all butt joints with a fiber cement compatible sealant (paintable, flexible). Do not leave unsealed joints — this is where water and embers enter.
- Prime and paint within 180 days of installation (James Hardie's warranty requires it). Use an elastomeric exterior paint — two coats minimum.
Total siding upgrade cost for a 1,500 sq ft (139 m²) single-story home exterior: $7,500–$15,000 for fiber cement installed, $12,000–$45,000 for brick veneer.
Step 7 — Upgrade Decks and Openings Under Elevated Structures
Elevated decks act as fuel platforms — burning debris collects under them, and the open space below traps heat and allows fire to attack the floor framing.
- Enclose the underside of the deck with 1/8-inch (3 mm) mesh screening on a metal frame to prevent debris accumulation underneath.
- Replace wood deck boards with composite or metal decking (Trex Transcend, Fiberon Horizon, or aluminum decking).
- Install 1/8-inch mesh along all open joist bays where the deck attaches to the house to prevent ember intrusion at the ledger.
- Replace any wood lattice skirting with metal, masonry, or noncombustible composite.
IRC 2021 Ignition-Resistant Construction (IRC) Summary
The 2021 IRC Section R327 defines Ignition-Resistant Construction (IRC) for WUI zones. Key minimums:
- Roofing: minimum Class A
- Exterior walls: noncombustible or ignition-resistant material on the exterior face
- Vents: 1/8-inch (3 mm) maximum opening dimension
- Decks attached to the home: minimum ignition-resistant decking (ASTM E2632 tested)
- Exterior windows: single pane glass is not permitted in high-fire-risk zones; use dual-pane or tempered glass
Check with your local building department — many counties in California, Colorado, Oregon, and Texas have adopted or exceeded IRC 2021 WUI provisions.
Cost Summary
| Upgrade | Low (USD) | High (USD) |
|---|---|---|
| Zone 0 gravel and noncombustible materials | $1,500 | $5,000 |
| Zone 1 vegetation management (professional) | $500 | $2,000 |
| Class A roof replacement (1,500 sq ft / 139 m²) | $6,000 | $15,000 |
| Ember-resistant vents (20 vents) | $300 | $1,600 |
| Fiber cement siding (1,500 sq ft / 139 m² exterior) | $7,500 | $15,000 |
| Deck upgrade to noncombustible | $2,000 | $8,000 |
| Total (incremental upgrades only) | $5,000 | $15,000 |
| Total (full exterior retrofit) | $17,800 | $46,600 |
Material selection and regional sourcing
Selecting fire-resistant materials depends on your climate, available suppliers, and local code requirements. This guide helps you match materials to conditions and navigate the inspection process.
Class A materials by region
| Region | Recommended roofing | Recommended siding | Regional consideration |
|---|---|---|---|
| Pacific Northwest / Northern California | Metal standing seam | Fiber cement (James Hardie) | High rainfall means metal roofing sheds debris and resists moss; fiber cement handles moisture cycles |
| Intermountain West (CO, UT, MT, ID) | Metal or concrete tile | Stucco or fiber cement | Freeze-thaw cycles limit concrete tile at elevations above 7,000 ft (2,134 m) — verify frost rating |
| Southwest (AZ, NM, TX) | Concrete or clay tile | Stucco (traditional 3-coat) | Natural stucco integrates with regional architecture; clay tile is traditional and Class A rated |
| Southeast (FL, GA, SC) | Metal standing seam | Fiber cement | Hurricane wind ratings matter as much as fire rating; metal roofing withstands 140+ mph (225+ km/h) winds |
Window and opening protection
Windows are the weakest thermal barrier on a home's exterior during a wildfire. Single-pane glass can crack and fail within 1–2 minutes of direct radiant heat exposure, allowing burning gases and embers to enter. Dual-pane and tempered glass significantly extend that window.
Glass specifications:
- Single-pane annealed glass: Fails at radiant heat exposures above approximately 4 kW/m² — too low for close-range wildfire exposure. Not permitted in high-fire-risk zones under IRC 2021 R327.
- Dual-pane insulated glass units (IGU): Standard dual-pane provides roughly twice the thermal resistance of single-pane. The air gap reduces heat transfer. Most new-construction windows are dual-pane by default — verify your existing windows if the home is pre-2000.
- Tempered glass: Tempered (heat-treated) glass resists thermal shock and, when it does fail, shatters into small granular pieces rather than large shards. All skylights should be tempered. In WUI construction, tempered glass in any window within 10 feet (3 m) of the roofline or within Zone 0 significantly reduces ignition risk.
- Multi-pane with tempered outer pane: The current best-practice specification for WUI windows. The tempered outer pane handles radiant exposure; the inner pane maintains the thermal barrier even if the outer cracks.
Exterior shutters and screens:
- Metal roll shutters (aluminum or steel): Provide a complete barrier against both radiant heat and flying embers. Most effective option for windows facing vegetation zones. A moderate investment per window — worth prioritizing on the most exposed faces of the structure.
- Metal screens (1/16-inch / 1.6 mm maximum mesh): Catch ember cast before it contacts the glass. Install on an exterior frame that allows airflow — not directly against the screen. Do not use fiberglass screen in WUI zones; it melts.
- Noncombustible window sills: Replace wood sill trim and exterior casing with fiber cement or metal to eliminate the ignition path where embers accumulate on horizontal surfaces below windows.
Skylights: Skylights are high-risk because debris and embers accumulate in the well. Use dual-pane tempered glass, install wire mesh (1/8-inch / 3 mm) over the exterior frame, and seal the flashing fully with elastomeric caulk. Plastic (polycarbonate or acrylic) skylights are not permitted in WUI zones — they melt and create an ember entry point.
Sourcing fire-rated materials
- Roofing supply yards (ABC Supply, Beacon Building Products, local independents) stock Class A materials at contractor pricing — 15–25% below retail home centers. Call ahead with your square footage and ask for Class A product recommendations for your zip code.
- Fiber cement siding: James Hardie HardiePlank is the dominant brand. Hardie has regional product lines (HZ5 for areas with freeze-thaw, HZ10 for moderate climates) — verify you are ordering the correct zone product.
- Ember-resistant vents: Brandguard, Vulcan Vent, and O'Hagin are the three IBHS-tested manufacturers. Order directly from manufacturer websites or through roofing suppliers — most home centers do not stock them.
- Windows and glazing: Milgard, Andersen, and Pella all offer WUI-compliant window lines with tempered exterior glass. Specify "WUI glazing" or "tempered outer pane" when ordering. Retrofit tempered glass replacement panes are available through glass suppliers for existing frames — a significantly less expensive option than full window replacement.
Inspector sign-off procedures
In WUI zones, fire-resistant upgrades often require building permits and inspections. The process typically follows this sequence:
- Pre-work: Contact your county building department and describe the scope of work. Most roofing and siding replacements require a permit; Zone 0 vegetation clearing does not.
- Permit application: Submit material specifications (manufacturer data sheets showing ASTM E108 Class A rating for roofing, ASTM E84 flame spread index for siding). Fee is typically based on project value.
- Rough inspection: For siding — inspector verifies housewrap installation, flashing at penetrations, and nailing pattern before siding is applied.
- Final inspection: Inspector confirms material matches permit specifications, vent mesh is 1/8-inch (3 mm) maximum, and all penetrations are sealed. For roof work, the inspector checks underlayment, flashing, and ridge vent configuration.
- Certificate of completion: Filed with county records. This documentation is often required by insurance companies offering WUI premium discounts — keep a copy with your insurance policy.
Field note
Many insurance companies in WUI zones offer premium reductions of 5–15% for documented defensible space and fire-resistant upgrades. Nationwide, USAA, and State Farm all have WUI discount programs. Ask your agent specifically about Firewise USA certification — this community-level program often qualifies entire neighborhoods for reduced rates. Document every upgrade with dated photos and receipts.
Home hardening does not stop at fire. The same roofing and wall upgrades that resist ember intrusion also reduce wind damage — see storm hardening for the hurricane tie and roof deck fastening details that complement Class A roofing. For evacuation timing, threat assessment, and shelter-in-place decisions when wildfire approaches, see wildfire preparedness. If your upgrades require a permit, the inspection process above also applies to weatherproofing work on the building envelope. For below-grade refuge options when evacuation is not possible, see basements and safe rooms. A dedicated hardened interior room that serves both fire shelter-in-place and intruder resistance is covered in safe room design. The continuous insulation layers that contribute to fire resistance also reduce heat transfer through the building envelope — see home insulation for the complete thermal and fire interaction.