Shipping Container Homes
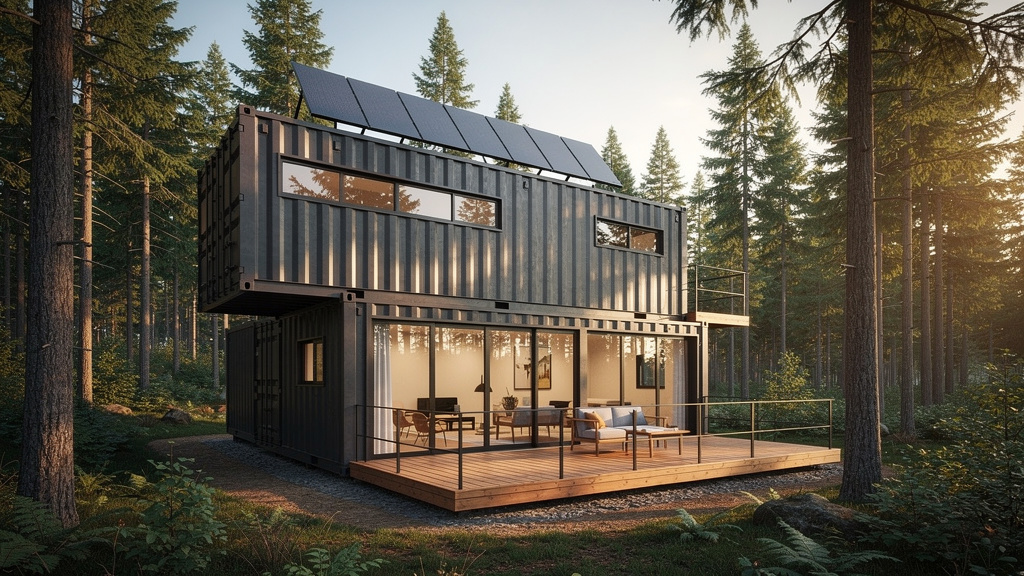
Shipping containers are appealing for off-grid and alternative housing because they are inherently structural, widely available, and deliver rapid enclosure — you can have four walls and a roof set in place in a single day with a crane. A single 20-ft (6.1 m) ISO container encloses 160 sq ft (14.9 m²) of floor area. A 40-ft (12.2 m) standard container provides 320 sq ft (29.7 m²), and a 40-ft high-cube adds 12 additional inches (30 cm) of ceiling height for 9.5 ft (2.9 m) total.
The cost range is dramatic: a basic single-container shell can be made livable for $15,000–$25,000 in materials. A fully finished, insulated, multi-container home with utilities runs $30,000–$120,000 depending on finish level, labor market, and site complexity. Pre-built container homes from commercial fabricators range from $50,000–$200,000+.
What is less obvious to first-time builders is that containers are also one of the easiest construction methods to get wrong. The steel shell creates condensation, extreme thermal bridging, formaldehyde off-gassing from floor treatments, and structural failure when walls are cut without header reinforcement. This guide covers all of those failure modes and how to prevent them.
Step 1 — Legal and Site Research (Do This First)
More container home projects fail at the permit stage than at any other step. Do not spend money on a container until this step is complete.
Zoning and permitting:
- Contact your county or city planning department and ask specifically about "alternative dwelling units" or "steel structure residential construction." Some jurisdictions class containers as manufactured housing; others use standard residential code; others prohibit them entirely.
- Obtain a copy of the zoning ordinance for your parcel. Look for: minimum square footage requirements, allowed building materials, setback distances, and accessory dwelling unit rules.
- Determine whether a licensed engineer must stamp your structural drawings. Most jurisdictions require a PE stamp for any structural modifications (wall cuts, floor openings, multi-container stacking).
- Engineering fees typically run $1,500–$4,000 for a single-container design and $3,000–$8,000 for multi-container structures.
Site access for delivery:
- A standard 20-ft container requires a truck with a minimum 40-ft (12.2 m) swing radius to back into position.
- A 40-ft container needs approximately 90 ft (27 m) of straight approach for standard tilt-bed delivery. If your site lacks this clearance, you need a crane — add $800–$2,500 to the budget.
- Mark all underground utilities (call 811 in the US) before the delivery truck arrives. A loaded container weighs 50,000–65,000 lbs (22,700–29,500 kg) and will crush utilities at shallow depths.
Soil and flood assessment:
- Have the site assessed for soil bearing capacity. Container corner posts concentrate loads at four points — each corner post of a loaded 40-ft container applies approximately 15,000–18,000 lbs (6,800–8,200 kg) to the ground.
- Check Federal Emergency Management Agency (FEMA) flood maps. Containers in a 100-year floodplain require elevation or anchoring — see Flood Protection.
Step 2 — Container Selection and Inspection
Not all used containers are suitable for habitation. Inspect before purchasing.
Grades:
| Grade | Condition | Typical Cost (20 ft) | Typical Cost (40 ft) |
|---|---|---|---|
| IICL (One-Trip) | Near-new, used once | $3,500–$6,000 | $5,000–$9,000 |
| CW (Cargo-Worthy) | Multiple trips, structurally sound | $1,800–$3,500 | $2,500–$5,000 |
| WWT (Wind/Water Tight) | Older, some denting | $1,200–$2,500 | $1,800–$3,500 |
| As-Is | Damaged, may have holes | $500–$1,500 | $800–$2,500 |
For habitation, use CW grade or better. IICL (one-trip) containers are ideal but significantly more expensive.
What to inspect on-site before buying:
- Floor condition: Most containers have a 1.1-in (28 mm) thick bamboo or tropical hardwood floor treated with pesticides (methyl bromide) or preservatives. Test for chemical contamination with a methyl bromide test kit (inexpensive) if occupants will breathe near the floor. If positive, the floor must be encapsulated or replaced.
- Rust inspection: Check corner castings, floor crossmembers, and any welded seams. Surface rust on exterior paint is normal. Pitting rust on structural members is a disqualifier — the structural steel is not repairable to original spec without certified welding.
- Panel deformations: Step back and sight down the length of the container. Corrugated side panels should be flat — bows greater than 1 in (25 mm) indicate overloading history and potential frame damage.
- Roof ponding: Water ponding on the roof causes accelerated corrosion. Look for rust staining radiating from the roof edges down the end walls.
Step 3 — Foundation
Containers must bear at their corner castings only — the four ISO corner blocks at each corner of the container. If you support the container at the floor crossmembers or mid-span, the floor warps and the walls rack out of square.
Pier foundation (minimum cost):
- Mark the four corner positions of the container precisely on the ground.
- Excavate four pits 24 in × 24 in (61 × 61 cm) and 36 in (91 cm) deep (adjust for local frost depth — must be below the frost line).
- Fill with 6 in (15 cm) of compacted gravel, then pour concrete piers to 6 in (15 cm) above grade.
- Set a steel baseplate (3/8 in / 10 mm thick, 12 × 12 in / 30 × 30 cm) in the wet concrete, with 4 anchor bolts.
- Bolt down the container corner castings using ISO corner block fittings or welded steel tabs.
Perimeter strip foundation:
More material-intensive but provides better support for multi-container structures or structures in high-wind or seismic zones.
- Pour a continuous concrete strip 18 in (46 cm) wide × 12 in (30 cm) deep below frost line under the full perimeter of the container footprint.
- The top surface of the strip must be flat and level within 1/4 in (6 mm) across the full length — use a self-leveling laser and wet concrete screeding to achieve this.
- Embed anchor bolts at container corner positions and at midspan on 40-ft containers (6 anchor bolts minimum for a 40-ft container).
Warning
A container that is not level will have racking stress in all four corner posts permanently. Doors will not open or close. Walls will crack any drywall or finish material. Check level before the delivery truck leaves — it is much easier to shim or grout the container into position while the crane is still on-site.
Step 4 — Structural Modifications
The corrugated steel walls of a container are structural — they carry both vertical loads (the weight of the container and anything stacked on it) and horizontal loads (wind, racking, stacking). When you cut a hole in a wall, you remove structural capacity and must replace it with steel header framing.
Never cut before reinforcing. The sequence is:
- Mark the opening on the container wall. Minimum clearance from corner posts: 18 in (46 cm) from any corner casting.
- Fabricate and weld the header frame first, before cutting. The header frame is a rectangular steel frame of 3 × 3 in × 1/4 in (76 × 76 × 6 mm) angle iron or tube steel, sized 2 in (50 mm) larger than the rough opening on all sides.
- Weld the header frame to the container wall from the outside, tacking at 6-in (15 cm) intervals around the perimeter.
- Only then cut the opening from inside using an angle grinder with a cutting disc or a plasma cutter. A standard 4 × 8 ft (1.2 × 2.4 m) window rough opening takes approximately 2–4 hours to cut and frame.
- Grind all cut edges smooth and apply cold galvanizing compound (zinc-rich primer) immediately — bare steel rusts within hours in humid conditions.
Structural limits:
- A single side wall of a 20-ft container can accept openings totaling up to 60% of wall area without additional reinforcement beyond the header frame.
- Removing more than 60% of a wall requires a structural engineer to design supplemental steel framing — typically a 4 × 4 in (102 × 102 mm) hollow structural section (HSS) column at each side of the opening, connected to the roof rail.
- Do not cut the corner posts or roof rails — these are the primary structural elements of the container and cannot be interrupted.
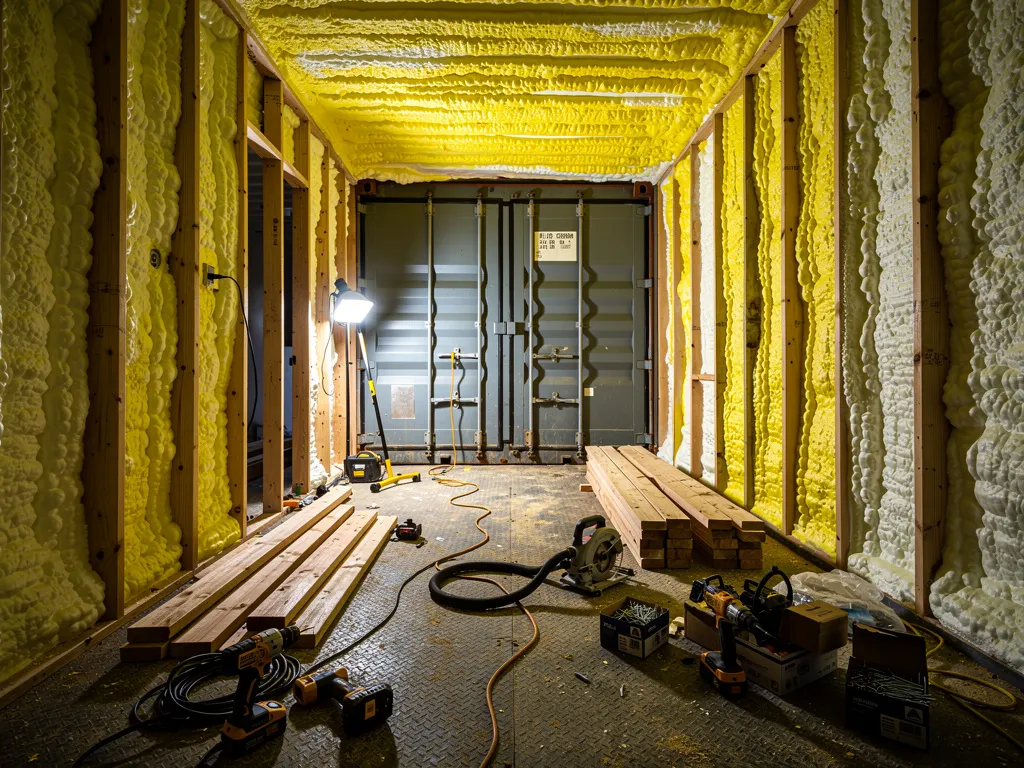
Step 5 — Insulation and Condensation Control
This is the most common place container home projects go seriously wrong. Steel is an excellent thermal conductor — it creates thermal bridges from interior to exterior at every structural element. Without proper insulation, the interior steel surfaces will condense water at temperatures above the dew point, leading to mold, corrosion, and air quality problems within 1–3 years.
The condensation problem in detail:
When warm humid interior air contacts cold steel (below the dew point), moisture condenses immediately on the steel surface. A 40-ft container with 6,200 sq ft (576 m²) of total steel surface area can deposit 1–3 gallons (4–11 L) of water per night in humid summer conditions if uninsulated. That water sits behind any interior finish material and causes mold.
Solution: Eliminate the dew point surface inside the building envelope.
Option A — Closed-cell spray polyurethane foam (SPF): Best performance
- Clean the interior steel surface — remove rust scale, oil, and dust. Wipe with mineral spirits.
- Apply 2 in (50 mm) of closed-cell SPF to all interior walls, roof, and floor steel. This brings the thermal assembly to approximately R-12 ($3,000–$6,000 for a 40-ft container, professional application).
- The SPF adheres directly to steel and creates an air and vapor barrier simultaneously. There is no gap between the foam and the steel — no condensation surface.
- Add 2 in (50 mm) of rigid mineral wool or polyisocyanurate board over the SPF if higher R-values are needed (reaching R-25 total).
Field Note
If you cannot afford professional SPF application, rent a two-component spray foam kit ($400–$700 for 200 board feet / 0.5 m³) and apply the foam yourself. The technique requires practice — watch training videos first and do a small test section. The foam expands rapidly and is very difficult to remove once cured.
Option B — Rigid foam board with air gap: Lower cost
- Install 2 × 2 in (38 × 38 mm) treated lumber hat channels horizontally across the corrugated walls using Tapcon or Hilti fasteners into the steel corrugations.
- Fill the cavity between channels with 1.5 in (38 mm) polyisocyanurate rigid foam.
- Tape all seams with aluminum foil tape.
- Install a layer of 6-mil polyethylene vapor retarder before interior framing.
This approach leaves small un-insulated steel bridges at every hat channel fastener — thermal bridging continues, but is reduced to manageable levels in moderate climates. Not recommended for climates below 20°F (-7°C).
Floor insulation:
The container floor crossmembers are steel I-beams every 12 in (30 cm). Either: - Build a raised subfloor on 2 × 4 in (38 × 89 mm) sleepers with R-13 batt insulation between, OR - Apply 2 in (50 mm) of closed-cell SPF to the underside of the floor before placing the container on its foundation.
Step 6 — Utilities
Container wiring and plumbing follow the same codes as conventional construction in most jurisdictions.
Electrical:
- Determine service entrance location. Main panel mounts to a steel wall using surface-mount boxes — no cutting studs required.
- Run conduit (EMT or PVC) on wall surfaces or through wall penetrations. Surface-mounted conduit is the most common and easiest approach.
- All penetrations through the container skin must be sealed with caulk or spray foam to prevent moisture ingress.
Plumbing:
- Establish water entry point and drain locations before insulation is installed — penetrations through the container floor are difficult to add later.
- In cold climates, insulate all plumbing runs — the steel floor provides no frost protection.
- Drain lines must be sloped and penetrate through the floor to a holding tank, septic, or dry well. See Sanitation for off-grid waste management options.
Ventilation:
Mechanical ventilation is mandatory in container homes. The tight steel shell, combined with the off-gassing potential from the original floor treatment and spray foam, requires fresh air exchange.
- Minimum: an energy recovery ventilator (ERV) providing 0.35 air changes per hour (ACH) for the gross volume.
- Simple alternative for small structures: two through-wall vents with fans, one low (supply) and one high (exhaust), sized at 1 sq in (6.5 cm²) per 150 cubic feet (4.25 m³) of gross volume.
Step 7 — Interior Finishing
With insulation and utilities complete, the interior finishes like any conventional room.
Ceiling:
- Install 2 × 2 in (38 × 38 mm) hat channels horizontally across the roof foam at 16 in (41 cm) on center.
- Attach 1/2 in (13 mm) drywall, tongue-and-groove pine, or corrugated metal panel to the hat channels.
- Interior ceiling height in a standard container is 7 ft 10 in (2.39 m). High-cube containers give 8 ft 10 in (2.69 m).
Walls:
- Attach interior finish over the insulation using the same hat channel system.
- Drywall requires taping and mudding as normal. For off-grid contexts, 3/4 in (19 mm) tongue-and-groove pine boards are faster and require no mud or drying time.
Floor:
- Apply 3/4 in (19 mm) plywood subfloor over the sleepers with construction adhesive and screws.
- Finish with any standard flooring material — vinyl plank, tile, or hardwood.
Cost Summary
| Phase | Low End | High End |
|---|---|---|
| Container (40-ft, CW grade) | $2,500 | $5,000 |
| Foundation (4 piers) | $800 | $2,500 |
| Delivery and crane | $600 | $2,500 |
| Structural modifications (2 large openings) | $1,500 | $4,000 |
| SPF insulation (professional) | $3,000 | $6,000 |
| Electrical (rough-in and panel) | $2,500 | $6,000 |
| Plumbing (rough-in) | $2,000 | $5,000 |
| Interior finish (basic) | $3,000 | $10,000 |
| Exterior siding or coating | $500 | $3,000 |
| Total (single 40-ft, basic finish) | $16,400 | $44,000 |
Related Pages
- Insulation — deep dive on thermal performance and vapor control strategies
- Weatherproofing — exterior coatings, drainage, and roof systems
- Tiny Homes — comparison with other small-footprint housing types
- Sanitation — off-grid waste and plumbing systems
- Carpentry — interior framing and finish carpentry techniques